The Beef Jerky Recipe originates from the Quechua word “Ch’arki,” meaning “dry, salted meat.” This traditional method of preserving meat has been used for centuries.
During family road trips, I found myself spending too much money on store-bought beef jerky. This sparked my journey to create the perfect homemade recipe. After experimenting with various techniques, I’m excited to share my findings.
This recipe produces tender, flavorful beef jerky that’s customizable to your taste preferences. By following this comprehensive guide, you’ll learn how to achieve the ideal texture without commercial equipment or preservatives.
Key Takeaways
- Learn how to make tender and flavorful homemade beef jerky
- Discover the secret to achieving the perfect texture
- Understand how to create a customizable marinade
- Find out how to store your beef jerky properly
- Get tips on selecting the right cut of meat for your jerky
Why Homemade Beef Jerky Is Worth the Effort
Crafting beef jerky at home allows for a level of quality control and customization that’s hard to achieve with commercial products. This personal touch not only enhances the flavor but also ensures that the jerky meets your dietary preferences.
My Journey to Creating the Perfect Beef Jerky
I discovered that making tender homemade jerky requires more than just following a recipe; it involves understanding the science behind preserving meat. Initially, my attempts resulted in jerky that was too tough, a common issue many face when making beef jerky at home.
The Secret to Tender Homemade Jerky
The key to tender jerky lies in the marinade, particularly in the balance between salt and sugar. Adding the right amount of brown sugar not only preserves the meat but also locks in moisture, resulting in a tender final product.
- The balance of salt and sugar is crucial for both preservation and tenderness.
- Proper slicing technique significantly contributes to the final texture.
- Using a meat tenderizer can help break down tough muscle fibers.
By understanding these elements, you can create jerky that’s not only delicious but also tender and safe to eat.
Selecting the Right Cut of Meat for Beef Jerky
The journey to perfect beef jerky starts with selecting the right cut of meat. The right cut can make all the difference in the tenderness, flavor, and overall quality of your jerky.
Why Eye of Round Roast Is Ideal
The Eye of Round Roast is a popular choice for beef jerky due to its lean nature and tender texture. It’s a cut that’s not only flavorful but also has the right amount of firmness, making it ideal for slicing into thin strips.
Preparing Your Meat for Slicing
Before slicing your meat, it’s helpful to pop it in the freezer for about 1 to 2 hours. This step makes the meat firmer, allowing for more precise slicing. To prepare your meat, trim away any visible fat and silverskin. Then, position the meat on a stable cutting board and use a sharp knife to slice it into uniform strips. This technique ensures that your jerky dries evenly. If you’re short on time, you can ask your butcher to slice the meat for you.
By following these steps, you’ll be able to achieve consistent meat slices that are perfect for making delicious beef jerky. Spending a few minutes on preparation can significantly improve the quality of your final product.
The Ultimate Beef Jerky Recipe Ingredients
The key to making exceptional beef jerky lies in its ingredients. When preparing your beef jerky, it’s crucial to select high-quality components that will enhance the flavor and texture of the final product.
Marinade Components Breakdown
A well-crafted marinade is essential for tender and flavorful beef jerky. The marinade typically consists of a combination of ingredients such as soy sauce, brown sugar, garlic, and spices. These components work together to add depth and complexity to the jerky.
The marinade also plays a critical role in tenderizing the meat. The use of meat tenderizer, which contains natural enzymes like bromelain or papain, helps break down tough muscle proteins in the beef, resulting in a more tender finished product.
The Role of Meat Tenderizer
Meat tenderizer is a crucial ingredient in making beef jerky, especially when working with leaner cuts of meat. It contains enzymes that partially digest the connective tissues, making the jerky more tender. I use McCormick meat tenderizer, which can be found in the spice section of most supermarkets.
- Meat tenderizer contains natural enzymes that break down tough proteins.
- These enzymes work by partially digesting connective tissues, resulting in tender jerky.
- Using meat tenderizer is especially important for leaner cuts of beef.
By combining the right ingredients, including a well-balanced marinade and meat tenderizer, you can create a delicious and protein-rich snack that’s perfect for any occasion.
Step-by-Step Beef Jerky Preparation
Creating the perfect beef jerky requires attention to detail in its preparation. The process involves several key steps that ensure a tasty and tender final product.
Slicing Techniques: With or Against the Grain
Slicing the meat correctly is crucial for tender beef jerky. Slicing against the grain means cutting the meat in the direction of the muscle fibers, resulting in a more tender product. To achieve this, freeze the meat for about 30 minutes to firm it up, making it easier to slice thinly and evenly.
Mixing the Perfect Marinade
Mixing the marinade is a critical step where flavors are combined to infuse the meat. To mix the perfect marinade, combine your chosen ingredients in a bowl and stir well until they’re fully incorporated. The marinade should have a balance of salty, sweet, and savory flavors.
Marinating Time and Techniques
Once the marinade is ready, add the sliced meat to it and toss until all pieces are evenly coated. You can store the meat in a large ziplock bag or a glass container covered with plastic wrap. Place it in the refrigerator for at least 12 hours or overnight. It’s a good practice to toss the meat or flip the bag once or twice during the marinating time to ensure even flavor distribution.
- Refrigerate the meat for 12-24 hours for the best flavor.
- Ensure the meat is fully submerged in the marinade for even flavoring.
- Never marinate at room temperature to avoid food safety risks.
By following these steps, you can create delicious homemade beef jerky that’s both tender and flavorful.
Drying Methods for Homemade Beef Jerky
There are several ways to dry beef jerky, each with its own advantages. The method you choose can significantly impact the final texture and flavor of your jerky. In this section, we’ll explore three popular drying methods: oven drying, using a food dehydrator, and smoking your beef jerky.
Oven Drying Method
Using your oven is a convenient way to dry beef jerky, especially if you don’t have a dehydrator. To do this, preheat your oven to its lowest temperature setting, usually around 150-200°F. Place the marinated meat slices on a baking sheet lined with parchment paper, ensuring they don’t overlap. Keep the oven door slightly ajar to allow moisture to escape. The drying time will vary depending on the thickness of your slices, but it typically takes 2-3 hours. Check on your jerky periodically to avoid overcooking.
Using a Food Dehydrator
A food dehydrator is a great tool for making beef jerky, as it provides a controlled environment for drying. Set the dehydrator to 160°F (71°C) and arrange the marinated meat slices in a single layer on the trays. Make sure to leave space between the pieces for air to circulate. The dehydration time will depend on the thickness of the slices and the specific dehydrator model, but it usually takes 3-4 hours. One of the benefits of using a dehydrator is that it allows for even drying and reduces the risk of overcooking.
Smoking Your Beef Jerky
Smoking adds a rich, complex flavor to your beef jerky that can’t be replicated with other drying methods. To smoke your jerky, you’ll need a smoker or grill with temperature control. Maintain a temperature between 160-180°F (71-82°C) and use mild wood chips like apple or cherry. Arrange the marinated meat on the smoker racks, leaving space between the pieces for smoke circulation. The smoking process typically takes 3-5 hours, depending on the thickness of the meat and your smoker’s performance. Monitor the temperature carefully to ensure it doesn’t get too hot, which can cook the meat instead of drying it. Smoking not only adds flavor but also helps preserve the jerky.
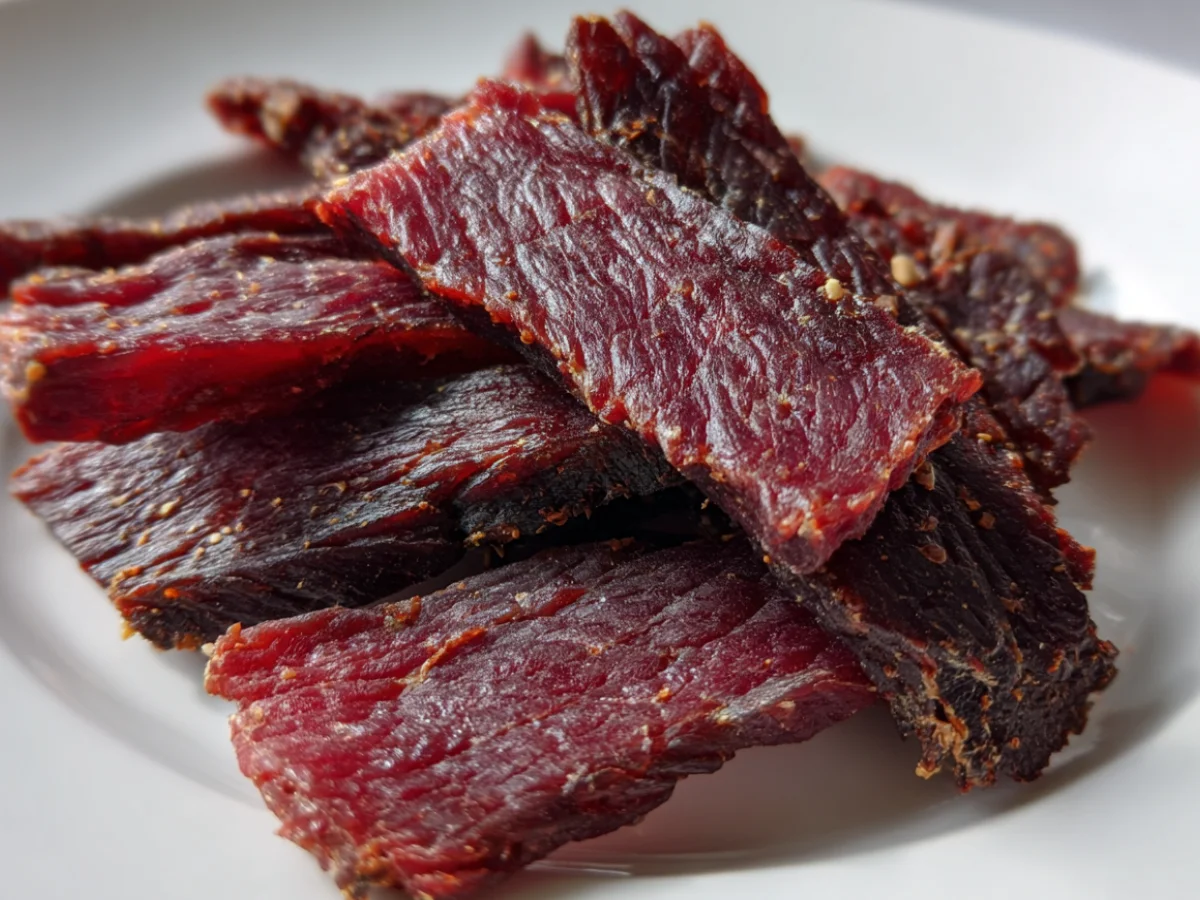
Regardless of the method you choose, the key is to dry the jerky until it’s firm but still pliable. If you bend it and it breaks, it’s overcooked. Start checking your jerky after the first hour and continue to monitor it until it reaches the desired texture.
Tips for Perfect Beef Jerky Every Time
Making great beef jerky every time requires attention to detail and a few simple tricks. To achieve consistent results, it’s crucial to understand the key factors that affect the quality of your jerky.
How to Test for Doneness
To determine if your beef jerky is done, remove a piece from the oven and let it cool to room temperature. It should be dry to the touch, have a leather-like appearance, and be chewy yet still somewhat tender. This simple test ensures your jerky is perfectly dried.
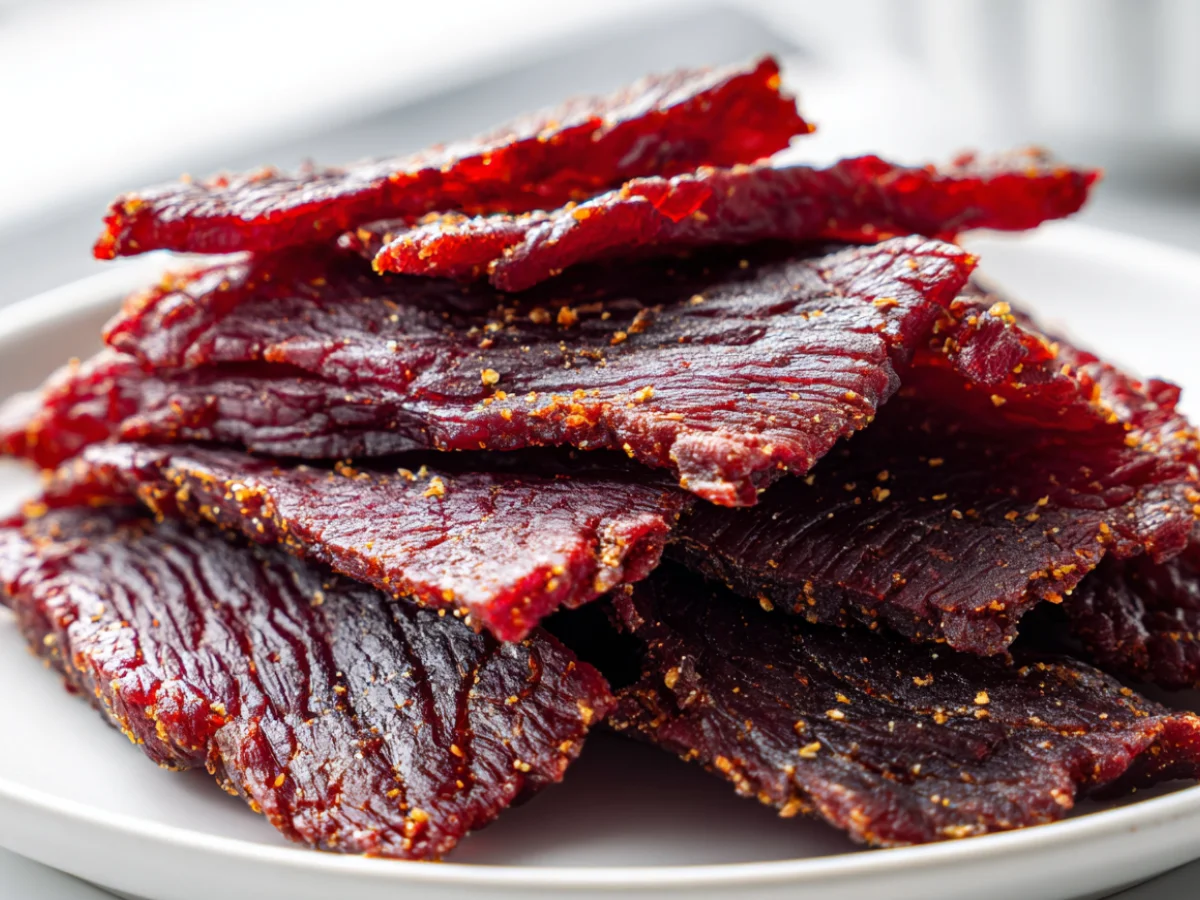
Customizing Flavors to Your Taste
Once you’ve mastered the basic beef jerky recipe, you can experiment with various flavor profiles. For a spicy kick, increase the amount of pepper or add ingredients like cayenne or hot sauce. You can also create sweet variations by adding honey or maple syrup to the marinade.
- Add smoky depth with liquid smoke or smoked paprika.
- Create a teriyaki-style jerky with more soy sauce, ginger, and a touch of pineapple juice.
- Experiment with herbs like rosemary, thyme, or oregano for unique flavors.
By following these tips and experimenting with different flavors, you can create beef jerky that’s tailored to your taste preferences. Remember to keep notes on your experiments to replicate successful batches.
Storing Your Homemade Beef Jerky
To keep your homemade jerky fresh, it’s essential to store it properly. Store the beef jerky inside an airtight plastic container or a Ziploc bag. Airtight glass jars are also a good option. Ensure the jerky has cooled completely before packaging to prevent condensation.
At room temperature, properly dried jerky will last about 1-2 weeks in an airtight container. For longer storage, consider refrigerating or freezing. Refrigerated beef jerky stays fresh for 1-3 months. For more tips on making the perfect beef jerky, visit Old Town Spices. Freeze jerky in vacuum-sealed bags for 6-12 months.
Conclusion
As we wrap up this journey to creating the perfect beef jerky, it’s clear that the reward is worth the effort. Making your own jerky at home results in a superior product to most store-bought options, offering a healthy, high-protein snack that you can customize to your dietary preferences.
The beef jerky recipe provided here serves as a foundation for endless experimentation with flavors and techniques. You can apply the skills you’ve learned to other meats like venison, turkey, or even salmon, making you proficient in creating a variety of dried meat snacks.
Once you’ve mastered this recipe, consider sharing your homemade jerky with friends and family as unique gifts. The cost savings over commercial beef jerky become significant over time, especially for regular consumers. With practice, you’ll refine your technique, and this beef jerky recipe will become a staple in your home cooking repertoire.
FAQ
What is the ideal temperature for drying beef jerky?
I recommend drying my beef jerky at a temperature between 160°F to 180°F. This temperature range helps to prevent bacterial growth and ensures a tender texture.
How long does it take to marinate beef strips?
I typically marinate my beef strips for at least 4 hours or overnight, which is around 8 hours. The longer it marinates, the more flavorful it becomes.
Can I use a different cut of meat for making beef jerky?
Yes, you can use other lean cuts of meat, such as top round or flank steak. However, I find that eye of round roast is ideal due to its lean nature and tender texture.
How do I store my homemade beef jerky to maintain its freshness?
I store my beef jerky in an airtight container or plastic bag and keep it in the refrigerator to maintain its freshness. You can also store it in the freezer for longer periods.
What is the role of meat tenderizer in making beef jerky?
Using a meat tenderizer helps to break down the proteins in the meat, making it more tender and easier to chew. I add a small amount of meat tenderizer to my marinade to enhance the texture.
Can I customize the flavor of my beef jerky?
Absolutely! You can experiment with different ingredients, such as garlic, onion powder, and brown sugar, to create unique flavor profiles. I like to adjust the marinade to suit my taste preferences.
How do I know when my beef jerky is done?
I check my beef jerky for doneness by testing its texture. It should be dry and slightly flexible. If it’s still too moist, I continue to dry it until it reaches the desired texture.