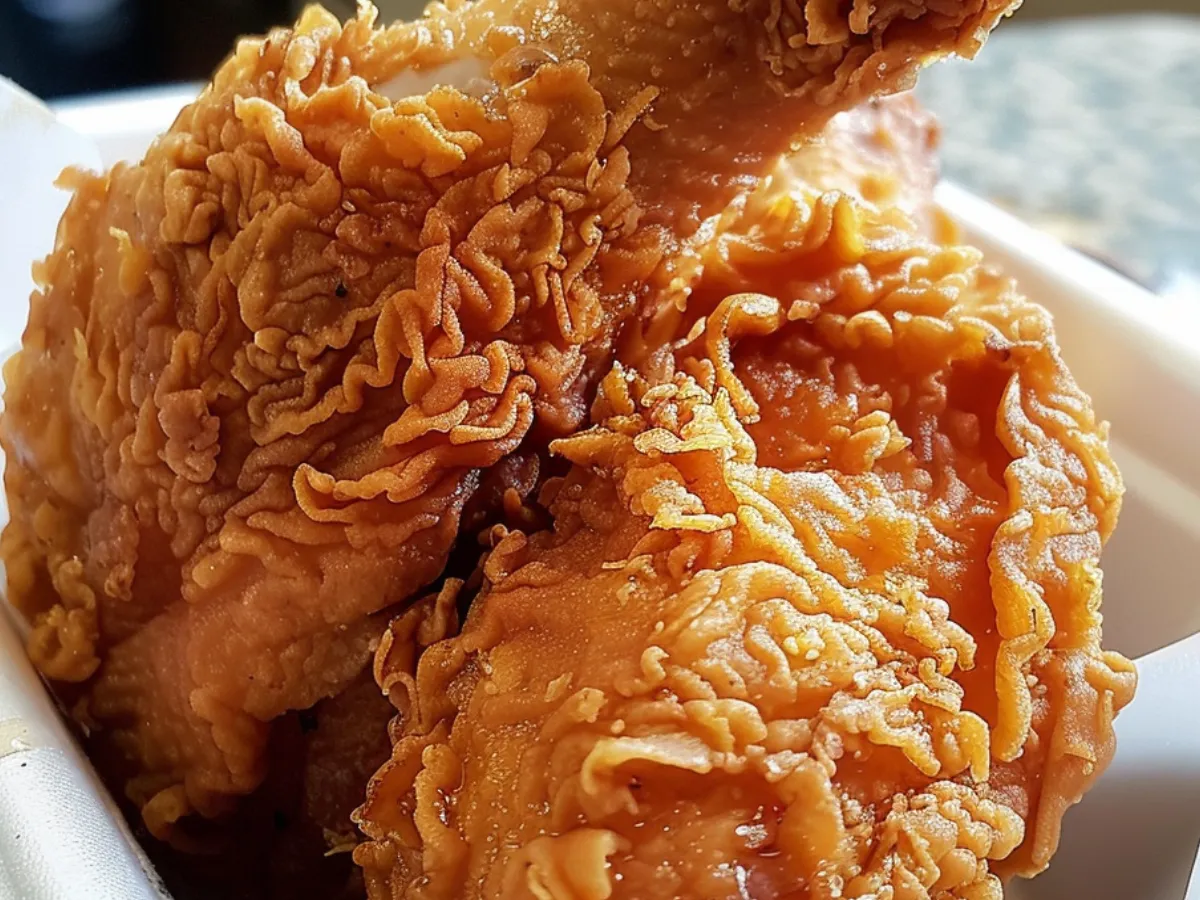
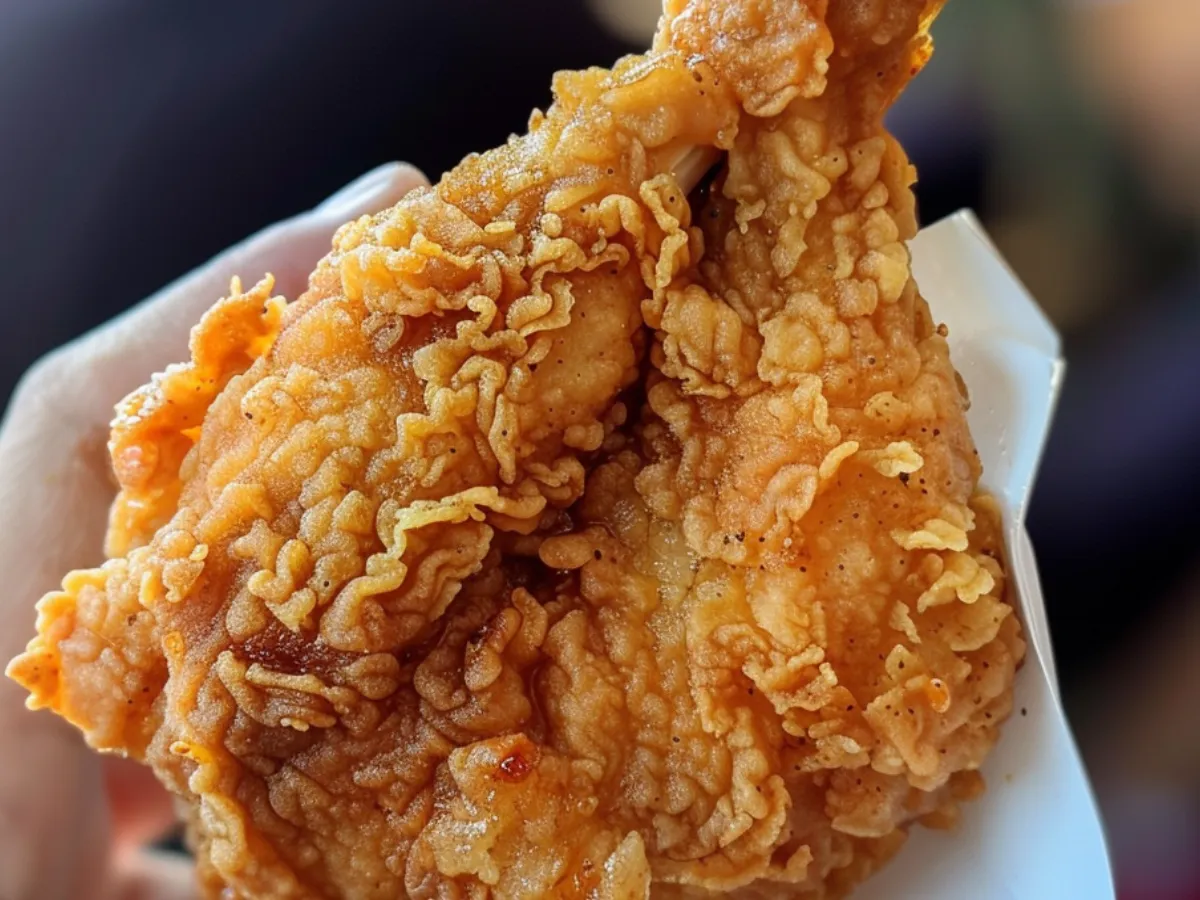
There’s something undeniably special about biting into a piece of crispy fried chicken that’s juicy on the inside and crunchy on the outside.
For me, the journey to perfecting this dish was a matter of trial and error, experimenting with various techniques until I landed on a foolproof recipe.
My simple guide will walk you through the steps to achieve this mouth-watering result, focusing on the essential ingredients and the technique that makes all the difference.
Key Takeaways
- Discover the secret to making consistently crispy and juicy chicken.
- Learn the importance of selecting the right chicken pieces.
- Understand the role of each ingredient in achieving the perfect crunch.
- Follow a step-by-step guide to preparing the best fried chicken.
- Tips on storing leftovers while maintaining crispiness.
The Secret to Perfect Crispy Fried Chicken
The art of making crispy fried chicken involves understanding the science behind the cooking process. To achieve that perfect crunch, several key elements come into play.
Why My Recipe Works
My fried chicken recipe stands out due to its attention to detail in both preparation and cooking. The double-fry technique is a game-changer, ensuring that the chicken stays crispy even after it cools down. Additionally, the use of paprika not only adds a smoky flavor but also aids in browning due to its low smoke point.
Key Elements for Maximum Crispiness
Several factors contribute to the crispiness of fried chicken. The right flour-to-seasoning ratio is crucial, as is temperature control during frying. Allowing the coated chicken to rest before frying prevents coating slide-off, ensuring a smooth, even crust. The choice of oil and maintaining its temperature is also vital.
Essential Ingredients for Crispy Fried Chicken
To make truly exceptional crispy fried chicken, it’s essential to start with the right ingredients. The quality and combination of these ingredients will directly impact the final product’s texture and flavor.
Choosing the Right Chicken Pieces
Selecting the right chicken pieces is crucial for achieving that perfect balance of crunch and juiciness. I prefer using a mix of legs, thighs, and wings for their flavor and texture.
The Role of Buttermilk in Tenderizing
Buttermilk plays a significant role in tenderizing the chicken. Its acidity helps break down the proteins, resulting in a more tender and moist final product.
Flour and Seasonings That Make a Difference
All-purpose flour is the foundation of my coating, providing the perfect texture and browning beautifully. I enhance the flour with paprika, salt, and pepper for added flavor and a gorgeous golden-brown color. Experimenting with additional seasonings allows me to adjust the seasoning blend to suit various tastes.
The right flour mixture is key to a crispy coating. I rely on all-purpose flour for its versatility and effectiveness in creating a crunchy exterior.
My Buttermilk Brine Method
To achieve the crispiest fried chicken, I rely on a simple yet effective buttermilk brine method. This technique involves marinating chicken pieces in a mixture that tenderizes them, making the final product both flavorful and juicy.
Creating the Perfect Brine Mixture
The brine mixture is crucial for tenderizing the chicken. I place the pieces in a gallon-size resealable bag and pour the remaining brine into it. After sealing the bag and pressing out as much air as possible, I toss the chicken to coat it evenly. The bag is then laid flat in the refrigerator to marinate.
Optimal Marinating Time
The time spent marinating is critical. I’ve found that a minimum of 4 hours is necessary for the buttermilk to properly tenderize the chicken. For the best results, marinating overnight (8-12 hours) is ideal, allowing flavors to penetrate without breaking down the meat. The maximum marinating time should not exceed 24 hours, as the acid in the buttermilk can make the chicken mushy if left for too long, affecting the overall quality at a certain time.
Preparing the Coating Mixtures
The key to a great fried chicken coating starts with preparing the right mixtures. To achieve that perfect crunch, it’s essential to get both the batter and the flour dredge just right.
The Batter: Creating the Right Consistency
While the focus here is on the coating mixtures, a good batter is equally important. It should be smooth and free of lumps, coating the chicken evenly. The right consistency is crucial for the batter to adhere properly to the chicken.
The Flour Dredge: Seasoning Secrets
To prepare the flour dredge, I place one large paper lunch bag inside another. In the bag, I whisk together flour, cornstarch, and salt. My flour mixture combines all-purpose flour with cornstarch in a specific ratio, creating a crispy exterior without becoming too thick. I season the mixture generously, as it forms the outer layer of the fried chicken. Adding a small amount of baking powder creates extra crispiness. The seasoning is crucial here – the coating should taste good on its own.
- My flour dredge is a mix of all-purpose flour and cornstarch for the perfect crisp.
- I season my flour mixture generously for a flavorful coating.
- Using a paper bag for dredging allows for an even coating with less mess.
- Adding baking powder to the flour mixture enhances crispiness.
- Keeping the flour mixture at room temperature prevents clumping.
Step-by-Step Frying Process
The moment of truth in making crispy fried chicken arrives when you heat up the oil for frying. This process requires attention to detail and a bit of patience, but the result is well worth the effort.
Dredging Technique for Even Coating
A proper dredging technique ensures that the chicken pieces are evenly coated, which is crucial for achieving that perfect crispy exterior. To dredge, gently coat the marinated chicken pieces in the flour mixture, shaking off any excess.
First Fry: Getting the Chicken Cooked
The first fry is all about cooking the chicken through. Heat the hot oil until it reaches 350°F, then carefully add the coated chicken pieces in batches to avoid overcrowding. Fry until the chicken is cooked through, then remove it from the oil and let it rest.
Second Fry: Achieving the Golden Crunch
For the second fry, increase the oil temperature to 350°F. Working in batches, return the chicken to the hot oil and continue to fry until crispy and the crust is golden brown, 3 to 4 minutes. Transfer the chicken to a wire rack to cool completely.
The second fry is my secret to achieving restaurant-quality crispiness. By increasing the oil temperature and frying for a shorter duration, I achieve a golden brown exterior without overcooking the chicken.
Temperature Control: The Key to Crispy Fried Chicken
Temperature control is the unsung hero of fried chicken recipes, and I’m here to share my approach. The right temperature management makes all the difference between a piece of fried chicken that’s cooked to perfection and one that’s either burnt or soggy.
Starting with High Heat
I begin the frying process with high heat to achieve an initial crispy coating. This initial blast of heat sets the coating and starts the cooking process. It’s crucial to monitor the oil temperature closely during this phase to prevent it from getting too hot.
Reducing and Finishing: My Temperature Strategy
After the initial browning, I reduce the heat to maintain an oil temperature between 290-300°F. This stage, which lasts around 10-13 minutes depending on the chicken piece size, allows the chicken to cook through gently. Finally, I increase the temperature back to 350°F for the final crisping stage, ensuring maximum crispiness. Active management of frying time and temperature is key to achieving the perfect balance.
Equipment You’ll Need
To achieve the perfect crispy fried chicken, having the right equipment is crucial. Frying chicken to perfection requires more than just a good recipe; it demands the right tools to ensure safety and quality.
Best Pots and Pans for Frying
A deep pot or a heavy-bottomed pan is essential for frying chicken. I prefer using a container that can hold enough oil to fully submerge the chicken pieces. A reliable thermometer is also a must-have to monitor the oil temperature accurately.
Tools for Safe and Effective Frying
To ensure safe and effective frying, I set up a proper draining station next to my stovetop, consisting of a wire rack placed over a sheet tray. This setup allows for air to circulate around the fried chicken, catching any oil drips. Additionally, I use long metal tongs with heat-resistant handles to handle the chicken safely, and a metal spider strainer to remove any loose coating bits from the oil.
Troubleshooting Common Fried Chicken Problems
The path to perfect fried chicken is rarely without obstacles, but with a few simple fixes, you can achieve crispy, delicious results every time.
Why Breading Falls Off
Breading can fall off due to improper coating techniques or insufficient adhesion. To prevent this, ensure that your chicken is properly dredged in flour before dipping in the wet mixture, and then coat again in flour or breadcrumbs. Pressing the coating onto the chicken gently can also help it stick.
Fixing Undercooked or Overcooked Chicken
Undercooked chicken is a safety risk, while overcooked chicken is dry and unpleasant. Use a thermometer to check the internal temperature of the chicken; it should reach 165°F. Adjust your cooking time and temperature accordingly to avoid these issues.
Dealing with Soggy Coating
A soggy coating can ruin an otherwise perfect batch of fried chicken. To avoid this, drain the chicken on a wire rack after frying, rather than on paper towels, to prevent steam from getting trapped. Also, ensure that the oil temperature is correct, as too low a temperature can cause the coating to absorb excess oil.
Variations on My Basic Recipe
As you become more comfortable with the basic fried chicken recipe, you can begin to experiment with new flavor profiles and regional styles.
Spice Level Adjustments
To adjust the spice level, you can modify the amount of seasoning in your recipe. For a bolder taste, similar to KFC’s fried chicken recipe, consider adding oregano and MSG to your marinade.
Alternative Coatings and Techniques
Experimenting with different coatings can significantly alter the texture and flavor of your fried pieces. Techniques like double-frying, as used in Korean fried chicken, can achieve a crunchier exterior.
Regional Fried Chicken Styles I Love
Various regional styles offer unique twists on fried chicken. For instance, Nashville hot chicken is brushed with a cayenne-laden oil mixture after frying, while Southern-style increases black pepper and adds garlic powder. Other styles like Korean, Japanese karaage, and Peruvian incorporate different marinades and coatings, offering a range of flavor profiles and cooking styles.
Serving and Pairing Suggestions
Fried chicken is more than just a dish; it’s an experience that can be elevated with the right pairings. The key to a memorable meal lies in the accompaniments and how they complement the flavor of the fried chicken.
Classic Side Dishes
Classic side dishes are essential for a well-rounded meal. Some popular options include:
- Mashed potatoes, which pair perfectly with a simple pepper cream gravy.
- Coleslaw, adding a refreshing crunch to the meal.
- Biscuits, serving as a comforting complement to the crispy fried chicken.
Dipping Sauces That Complement
Dipping sauces can significantly enhance the flavor of fried chicken. Some favorites include:
- Honey mustard and ranch for a creamy, tangy taste.
- Buffalo sauce for those who enjoy a spicy kick.
- Maple syrup, especially when serving fried chicken with waffles, creating a sweet and savory combination.
Storing and Reheating for Continued Crispiness
Storing and reheating crispy fried chicken requires some simple techniques. To maintain crispiness, cool the chicken completely before storing it in an airtight container lined with paper towels to absorb excess moisture. Store in a single layer to prevent sogginess. Reheat in a 350°F oven for 15 minutes, then increase to 400°F for 5 minutes to re-crisp. Alternatively, use an air fryer at 350°F for 6-8 minutes. Avoid microwaving, as it makes the coating soft and rubbery. By following these steps, you’ll enjoy crispy fried chicken even after reheating.
FAQ
What type of oil is best for frying?
I recommend using a neutral-tasting oil with a high smoke point, such as peanut or avocado oil, to achieve the best flavor and texture.
How long should I marinate the chicken pieces in buttermilk?
For optimal tenderizing, I suggest marinating the chicken pieces in buttermilk for at least 2 hours or overnight.
Why is my coating falling off during frying?
If the coating is falling off, it may be due to insufficient drying of the chicken pieces before dredging or inadequate temperature control during frying. Make sure to pat dry the chicken pieces and maintain the correct oil temperature.
Can I bake the chicken instead of frying it?
While baking is a healthier alternative, it won’t produce the same crispy exterior as frying. However, you can try baking the chicken at a high temperature (around 425°F) for a shorter amount of time to achieve a slightly crispy exterior.
How do I prevent the chicken from becoming greasy?
To prevent greasiness, ensure that the oil is at the correct temperature before frying, and don’t overcrowd the pot. Also, draining excess oil on paper towels after frying can help.
Can I use all-purpose flour with cornstarch for an extra crispy coating?
Yes, mixing all-purpose flour with cornstarch can help create a lighter and crisper coating. The cornstarch helps to absorb excess moisture and adds texture to the coating.
How do I store leftover fried chicken to maintain crispiness?
To keep leftover fried chicken crispy, store it in an airtight container on a wire rack, allowing air to circulate around the pieces. Reheat it in the oven at a moderate temperature (around 350°F) until warmed through.