There’s something special about the How to Make Rotisserie Chicken perfectly cooked. For me, it’s a memory of family gatherings and warm, comforting meals. I’ve spent years perfecting my recipe for rotisserie chicken at home, and I’m excited to share it with you.
My recipe uses a simple spice rub that’s easy to make in big batches, so you can have it on hand whenever you need it. Just add a chicken and some oil, and you’re ready to go!
Cooking chicken to perfection is all about the right techniques and ingredients. With my method, you’ll achieve that signature rotisserie flavor with a crispy skin and juicy meat that’s hard to resist.
Key Takeaways
- Simple spice rub recipe for rotisserie chicken
- Easy to make in big batches for future meals
- Achieve perfect flavor and texture with my cooking method
- No need for a dedicated rotisserie appliance
- Adaptable cooking techniques for any oven
The Secret to Perfect Homemade Rotisserie Chicken
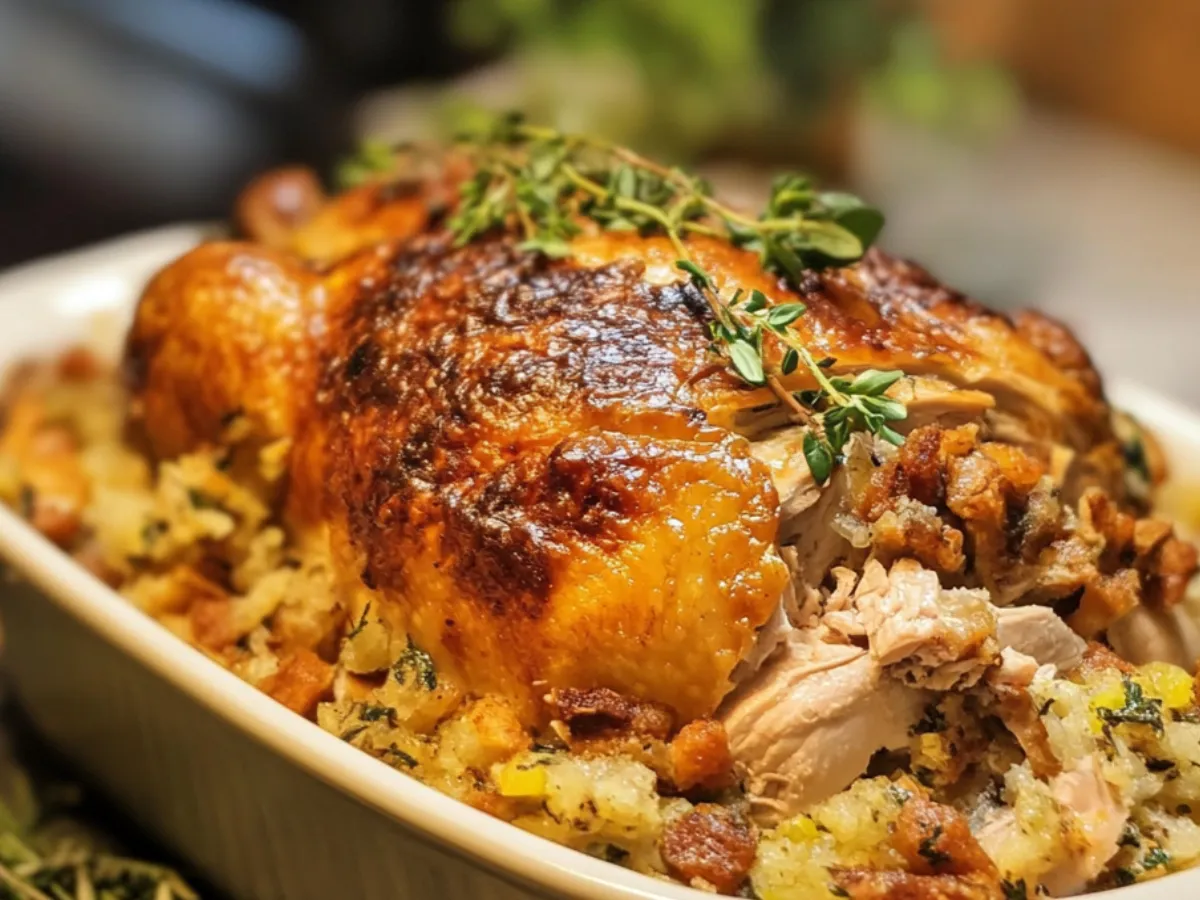
The allure of a perfectly cooked rotisserie chicken lies in its crispy skin and juicy meat, a result of a cooking technique that can be mastered at home. One of the main advantages of cooking a chicken on a rotisserie is the self-basting effect that occurs as the juices circulate throughout the meat during cooking.
There are several reasons why making rotisserie chicken at home is a great idea.
Why Make Rotisserie Chicken at Home?
Making rotisserie chicken at home allows you to control the ingredients and the flavor profile, ensuring that your dish is both delicious and tailored to your preferences. By cooking it at home, you can avoid additives often found in store-bought versions.
What Makes Rotisserie Chicken Special
The continuous rotation of the chicken on a rotisserie ensures even cooking and browning on all sides. This method also allows the fat to render properly, keeping the meat tender and resulting in that distinctive crispy skin. The rotisserie method concentrates flavor as moisture evaporates, resulting in a more intense taste throughout the chicken.
Essential Equipment for Making Rotisserie Chicken
The key to a delicious rotisserie chicken lies in the equipment you use. While a dedicated rotisserie oven is ideal, it’s not the only option for achieving that perfect rotisserie flavor at home.
Rotisserie Ovens and Attachments
A rotisserie oven or a rotisserie attachment for your grill can provide the authentic rotisserie experience. These devices allow for even cooking and browning of the chicken. If you’re looking for the best rotisserie oven for home use, consider one that offers adjustable heat and a spit for secure chicken placement.
Alternative Equipment Options
If you don’t have a rotisserie oven, don’t worry. You can still achieve remarkable results with a standard oven and a good roasting pan. A roasting pan, like the GraniteWare roasting pan, is perfect for oven roasting. You can also use a cast iron skillet or a vertical roaster to achieve crispy skin and evenly cooked chicken.
Other alternatives include air fryers with rotisserie functions and specialized roasting racks that elevate the chicken for more even cooking.
Ingredients for My Simple Rotisserie Chicken
The ingredients are the backbone of any great recipe, and my simple rotisserie chicken is no exception. To create a truly delicious rotisserie chicken, you’ll need to start with the right ingredients.
Choosing the Right Chicken
For my rotisserie chicken recipe, I recommend using high-quality chickens. The type of chicken you choose can significantly impact the final flavor and texture.
My Perfect Spice Rub
A mix of paprika, garlic salt, salt, and pepper creates a flavorful spice rub. I divide this mixture in half, using one portion to coat the chicken evenly and the other to mix with melted butter for basting.
Additional Flavor Enhancers
To add extra dimensions to your rotisserie chicken, consider incorporating additional flavor enhancers like lemon zest or fresh herbs into your spice rub. You can also create a compound butter with your spices for enhanced flavor penetration.
Using 2 tablespoons of olive oil helps the spice rub adhere to the chickens, while butter adds richness and promotes a golden-brown color. The combination of garlic and paprika in the spice rub gives the chicken a savory and slightly smoky taste.
Preparing Your Chicken for the Rotisserie
The key to a delicious rotisserie chicken lies in its preparation. Proper preparation ensures that your chicken is not only flavorful but also cooks evenly.
Dry Brining: The Secret to Flavorful Meat
Dry brining is a simple process that involves rubbing the chicken with salt and letting it sit before cooking. This technique enhances the flavor and texture of the meat. By dry brining, you can achieve a more complex taste profile in your rotisserie chicken.
How to Truss a Chicken
Trussing your chicken helps it cook more evenly. To truss, tie the legs together with kitchen twine, and tuck the wings under the body. This step is crucial for a rotisserie chicken, as it ensures consistent cooking and a more appealing presentation.
Applying the Spice Rub
To apply the spice rub, start by brushing the outside of the chicken with a thin layer of olive oil. Then, generously apply your spice rub all over, making sure to get some under the skin as well. Work the seasonings gently into the skin to enhance flavor penetration.
- Apply your spice rub generously, ensuring complete coverage including under wings and in any crevices for consistent flavor.
- For better adhesion, brush the chicken with a thin layer of olive oil before applying dry spices.
- Work the seasonings gently into the skin without tearing it.
How to Make Rotisserie Chicken in a Dedicated Rotisserie
A dedicated rotisserie makes it simple to achieve that perfect rotisserie chicken. To start, you’ll need to set up your rotisserie according to the manufacturer’s instructions.
Setting Up Your Rotisserie
Proper setup is crucial for even cooking. Ensure the rotisserie is clean and the spit is securely in place. Place the chicken on the spit, balancing it evenly to prevent any vibration during cooking.
Temperature and Timing Guidelines
Cook the chicken at a high temperature initially to get a nice browning, then reduce the heat. I recommend starting at a higher heat, around 425 degrees F, for the first 25 minutes. Then, reduce the heat to 350 degrees F.
Basting Techniques for Crispy Skin
Basting is a critical step for achieving that crispy skin. To enhance both flavor and appearance, create a basting mixture by combining melted butter with some of your reserved spice rub. Begin basting after the first 25 minutes of cooking, then continue at 15-minute intervals. This process adds fat that promotes browning and crisping of the skin, and the butter’s milk solids contribute to a beautifully bronzed color.
- Basting enhances flavor and appearance by adding fat that promotes browning.
- Apply basting liquid with a silicone brush for even coverage.
- The basting process helps retain juices within the chicken.
Alternative Cooking Methods
For those without a dedicated rotisserie, there are still ways to cook rotisserie-style chicken to perfection. While a dedicated rotisserie oven is ideal, alternative cooking methods can produce equally delicious results.
Oven-Roasted Method
The oven-roasted method is a straightforward alternative that yields fantastic results. To achieve the best outcome, preheat your oven to a high temperature, around 425°F (220°C), and season the chicken as desired. Roasting the chicken in the oven can produce crispy skin and juicy meat, similar to a rotisserie oven.
Pellet Grill Rotisserie Method
I recently acquired a Pellet Grill, and it’s been a game-changer. Pellet grills with rotisserie attachments offer the best of both worlds: the smoky flavor of grilling combined with the even cooking of rotisserie rotation. To use this method, preheat the Pellet Grill with a rotisserie attachment to 500°F (260°C). Pat the chicken dry, place it on the rotisserie spit, and cook for about 1 hour and 15 minutes, reducing the heat to 350°F (175°C) after 25 minutes and basting with spiced melted butter.
Some key benefits of using a pellet grill for rotisserie chicken include the ability to monitor temperature remotely with modern WiFi-enabled grills and the rich, smoky flavor imparted by the grill. The type of wood pellets used can also enhance the flavor, with options like apple or hickory providing different profiles.
How to Know When Your Rotisserie Chicken is Done
Determining the doneness of a rotisserie chicken is crucial for food safety and quality. Ensuring your chicken is cooked properly is vital to avoid foodborne illnesses.
Using a Meat Thermometer
A meat thermometer is a precise tool for checking the internal temperature of the chicken. Once done, it should register at 165 degrees F. This method is straightforward and leaves little room for error.
Visual Cues for Doneness
Besides using a thermometer, there are several visual cues to check for doneness.
- The chicken should display golden-brown skin with darker spots where fat has rendered and caramelized.
- When pierced at the thigh joint, the juices should run clear with no pinkish tinge.
- The legs should move easily in their sockets, and the thickest part of the thigh should feel firm but not hard when pressed.
- The skin should appear tight and crisp rather than rubbery.
By combining these methods, you can be sure your rotisserie chicken is done and ready to eat.
Conclusion: Enjoying Your Homemade Rotisserie Chicken
With your very own homemade rotisserie chicken, the possibilities for meals are endless. You’ve not only mastered a simple recipe but also gained a versatile dish that can be the centerpiece of countless meals.
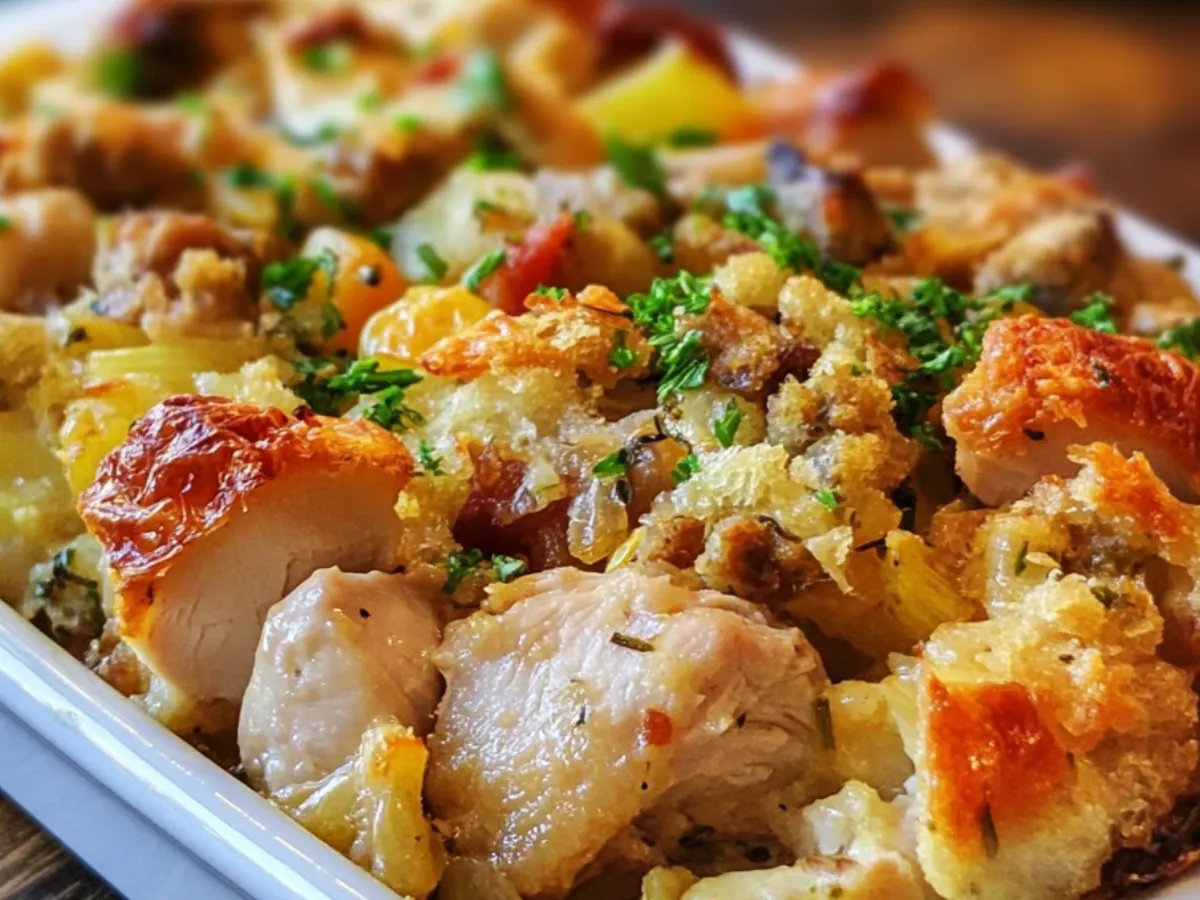
After removing the chicken from the rotisserie, let it rest for 10-15 minutes before carving to ensure the juices redistribute for maximum flavor and tenderness. You can enjoy it fresh or transform leftovers into delicious sandwiches, salads, soups, and casseroles.
- Cooking two chickens at once is also an option, as the cooking time remains the same, allowing for meal prep throughout the week.
- Properly stored rotisserie chicken leftovers remain good for 3-4 days or can be frozen for up to 3 months.
- The carcass can be used to make excellent homemade stock by simmering it with vegetables and herbs.
By following these tips, you can enjoy your rotisserie chicken and explore various recipes using leftovers, making the most of your cooking efforts.
FAQ
What temperature should I use to cook my rotisserie chicken?
I recommend cooking your rotisserie chicken at a medium-high heat, around 425°F (220°C), to achieve a crispy skin and juicy meat.
How long does it take to cook a whole chicken on a rotisserie?
The cooking time will depend on the size of your chicken and the heat of your rotisserie. Generally, it takes about 45 minutes to an hour to cook a 3-4 pound chicken.
Can I use a rotisserie attachment on my grill?
Yes, you can use a rotisserie attachment on your grill to achieve a rotisserie-style chicken. Just make sure to follow the manufacturer’s instructions for setup and temperature control.
What’s the best way to season my rotisserie chicken?
I like to use a mix of salt, pepper, garlic, and paprika to give my rotisserie chicken a rich, savory flavor. You can also add other herbs and spices to suit your taste.
How do I know when my rotisserie chicken is cooked to a safe internal temperature?
Use a meat thermometer to check the internal temperature of your chicken. It should reach 165°F (74°C) in the thickest part of the breast and 180°F (82°C) in the thighs.
Can I stuff my rotisserie chicken with aromatics like onion and garlic?
Yes, you can stuff your chicken with aromatics like onion and garlic to add extra flavor. Just be sure to remove them before serving.
How do I achieve crispy skin on my rotisserie chicken?
To get crispy skin, make sure to pat your chicken dry before cooking, and baste it with oil or melted butter during the cooking process.